
CodeIgniter Compress and Resize Uploaded Image

Now in this post, we will discuss how to compress images and how to resize uploaded image and display that image on a web page without page refresh.
In this post, we have the first load image library GD2 with a predefined option. Method of This image library will compress and resize uploaded image and store into upload folder. Then after we have store image name under database and then after we have to fetch image name from the database and display all images on the web page after successful image uploaded without page refresh.
This way we have make simple image gallery in code igniter framework, in this gallery we have compress and resize uploaded image without page refresh using ajax request. So this is my tutorial on how to compress and resize uploaded image in Code igniter framework.

Create the View Page :
give the view page name: std_imageupload
<?php error_reporting(0); ?>
<style>
label
{
font-weight: normal;
}
table tr:hover
{
background-color:silver;
}
</style>
<div class="col-md-12">
<div class="myfrom_header">
</div>
<script src="https://ajax.googleapis.com/ajax/libs/jquery/3.1.0/jquery.min.js"></script>
<form method="post" id="upload_form" align="center" enctype="multipart/form-data" class="form-control">
<div class="myfrom_body" style=" margin-left: 0px;">
<div class="mybodyfrom">
<div class="col-md-12">
<div class="form-group col-md-3">
<h3>CodeIgniter Tutorial - Compress and Resize Uploaded Image</h3>
</br>
Session
<select class="form-control" id="xsession" ng-model="xsession" name="xsession">
<option value="2010">2010</option>
</select>
</br>
</br>
</div>
<div class="form-group col-md-3">
Student ID
<input type="text" class="form-control" id="stdid" name="stdid">
</br>
</br>
</div>
<div class="form-group col-md-3">
Student Image
<input type="file" name="image_file" id="image_file" />
</br>
</br>
</div>
<div class="form-group col-md-3">
<input type="submit" name="upload" id="upload" value="Upload" class="btn btn-info" />
</div>
</form>
<div id="uploaded_image" style=" margin-top: 100px">
<?php echo $image_data; ?>
</div>
</div>
</div>
</div>
</div>
</div>
<script>
$(document).ready(function(){
$('#loading').hide();
$('#upload_form').on('submit', function(e){
e.preventDefault();
if($('#image_file').val() == '')
{
alert("Please Select the File");
}
else
{
$.ajax({
url:"<?php echo base_url(); ?>stdimageupload/ajax_upload",
//base_url() = http://localhost/tutorial/codeigniter
method:"POST",
data:new FormData(this),
contentType: false,
cache: false,
processData:false,
success:function(data)
{
$('#uploaded_image').html(data);
}
});
}
});
});
</script>
Create Controller Page :
Put the controller name: stdimageupload
----------------------------this is the controller ---------------------------------------------------------------------
<?php
//Desging and developed by : Eng Manirul islam March 17 2018
class stdimageupload extends CI_Controller {
function __construct()
{
parent::__construct();
$this->load->model(array('stdimage_model'));
$this->load->helper(array('html','form', 'url')); // form thakta haba
}
function index()
{ //
}
function ajax_upload()
{
if(isset($_FILES["image_file"]["name"]))
{
$config['upload_path'] = './studentphoto/';
$config['allowed_types'] = 'jpg|jpeg|png|gif';
$this->load->library('upload', $config);
if(!$this->upload->do_upload('image_file'))
{
echo $this->upload->display_errors();
}
else
{
$xsession = $this->input->post('xsession');
$stdid = $this->input->post('stdid');
$data = $this->upload->data();
$stdimage = $stdid.'-'.$data["file_name"];
// $config['file_name'] = $stdid.'-'.$data["file_name"];
$config['image_library'] = 'gd2';
$config['source_image'] = './studentphoto/'.$data["file_name"];
$config['create_thumb'] = FALSE;
$config['maintain_ratio'] = FALSE;
$config['quality'] = '60%';
$config['width'] = 200;
$config['height'] = 200;
// $config['file_name'] = $stdimage;
$config['new_image'] = './studentphoto/'.$stdid.'-'.$data["file_name"];
// print_r($config);
$this->load->library('image_lib', $config);
$this->image_lib->resize();
$this->load->model('stdimage_model');
unlink('./studentphoto/'.$data["file_name"]);
$image_data = array(
'studentimage' => $stdid.'-'.$data["file_name"],
'StdID' => $stdid,
'xsession' => $xsession
);
$this->stdimage_model->insert_image($image_data);
echo $this->stdimage_model->fetch_image();
//echo '<img src="'.base_url().'upload/'.$data["file_name"].'" width="300" height="225" class="img-thumbnail" />';
}
}
}
}
/* End of file data_agen.php */
/* Location: ./system/application/controllers/welcome.php */
--------------------End Controller-------------------------------------------------------------------
Create the Model
Put the model name : stdimage_model
<?php
class stdimage_model extends CI_Model {
function fetch_image()
{
$xsession = $this->input->post('xsession');
$stdid = $this->input->post('stdid');
$output = '';
$this->db->select("studentimage");
$this->db->from("std");
$this->db->where('StdID',$stdid);
$this->db->order_by("id", "DESC");
$query = $this->db->get();
foreach($query->result() as $row)
{
$output .= '
<div class="col-md-3">
'.$xsession.'
</div>
<div class="col-md-3">
'.$stdid.'
</div>
<div class="col-md-3">
<img src="'.base_url().'studentphoto/'.$row->studentimage.'" class="img-responsive img-thumbnail" />
</div>
';
}
return $output;
}
function insert_image($data)
{
$this->db->insert("std", $data);
}
}

#Tag
codeigniter seo helper,codeigniter seo library,how to create dynamic url in codeigniter,
slug in codeigniter,how to optimize codeigniter website,image compression code in codeigniter
codeigniter seo friendly url htaccess,codeigniter query optimization,codeigniter compress image before upload,image upload and crop in codeigniter
,php compress image before upload,codeigniter resize image base64,codeigniter image upload,image upload error in codeigniter,image resize not working in codeigniter,image upload and display in codeigniter,how to resize image size(quality) with codeigniter image_lib

Hello, what's up guys. I am going to show you. how you can upload image and SEO Optimized image upload with resize image whatever image size is. it will not break any image quality. so let's start with ......
and here is the video tutorial
Now in this post, we will discuss how to compress images and how to resize uploaded image and display that image on a web page without page refresh.
In this post, we have the first load image library GD2 with a predefined option. Method of This image library will compress and resize uploaded image and store into upload folder. Then after we have store image name under database and then after we have to fetch image name from the database and display all images on the web page after successful image uploaded without page refresh.
This way we have make simple image gallery in code igniter framework, in this gallery we have compress and resize uploaded image without page refresh using ajax request. So this is my tutorial on how to compress and resize uploaded image in Code igniter framework.
First Need to Create Mysql Database :give the database name is imageupload std

after complete, the database and table lets go to the CodeIgniter
Create the View Page :
give the view page name: std_imageupload
<?php error_reporting(0); ?>
<style>
label
{
font-weight: normal;
}
table tr:hover
{
background-color:silver;
}
</style>
<div class="col-md-12">
<div class="myfrom_header">
</div>
<script src="https://ajax.googleapis.com/ajax/libs/jquery/3.1.0/jquery.min.js"></script>
<form method="post" id="upload_form" align="center" enctype="multipart/form-data" class="form-control">
<div class="myfrom_body" style=" margin-left: 0px;">
<div class="mybodyfrom">
<div class="col-md-12">
<div class="form-group col-md-3">
<h3>CodeIgniter Tutorial - Compress and Resize Uploaded Image</h3>
</br>
Session
<select class="form-control" id="xsession" ng-model="xsession" name="xsession">
<option value="2010">2010</option>
</select>
</br>
</br>
</div>
<div class="form-group col-md-3">
Student ID
<input type="text" class="form-control" id="stdid" name="stdid">
</br>
</br>
</div>
<div class="form-group col-md-3">
Student Image
<input type="file" name="image_file" id="image_file" />
</br>
</br>
</div>
<div class="form-group col-md-3">
<input type="submit" name="upload" id="upload" value="Upload" class="btn btn-info" />
</div>
</form>
<div id="uploaded_image" style=" margin-top: 100px">
<?php echo $image_data; ?>
</div>
</div>
</div>
</div>
</div>
</div>
<script>
$(document).ready(function(){
$('#loading').hide();
$('#upload_form').on('submit', function(e){
e.preventDefault();
if($('#image_file').val() == '')
{
alert("Please Select the File");
}
else
{
$.ajax({
url:"<?php echo base_url(); ?>stdimageupload/ajax_upload",
//base_url() = http://localhost/tutorial/codeigniter
method:"POST",
data:new FormData(this),
contentType: false,
cache: false,
processData:false,
success:function(data)
{
$('#uploaded_image').html(data);
}
});
}
});
});
</script>
Create Controller Page :
Put the controller name: stdimageupload
----------------------------this is the controller ---------------------------------------------------------------------
<?php
//Desging and developed by : Eng Manirul islam March 17 2018
class stdimageupload extends CI_Controller {
function __construct()
{
parent::__construct();
$this->load->model(array('stdimage_model'));
$this->load->helper(array('html','form', 'url')); // form thakta haba
}
function index()
{ //
}
function ajax_upload()
{
if(isset($_FILES["image_file"]["name"]))
{
$config['upload_path'] = './studentphoto/';
$config['allowed_types'] = 'jpg|jpeg|png|gif';
$this->load->library('upload', $config);
if(!$this->upload->do_upload('image_file'))
{
echo $this->upload->display_errors();
}
else
{
$xsession = $this->input->post('xsession');
$stdid = $this->input->post('stdid');
$data = $this->upload->data();
$stdimage = $stdid.'-'.$data["file_name"];
// $config['file_name'] = $stdid.'-'.$data["file_name"];
$config['image_library'] = 'gd2';
$config['source_image'] = './studentphoto/'.$data["file_name"];
$config['create_thumb'] = FALSE;
$config['maintain_ratio'] = FALSE;
$config['quality'] = '60%';
$config['width'] = 200;
$config['height'] = 200;
// $config['file_name'] = $stdimage;
$config['new_image'] = './studentphoto/'.$stdid.'-'.$data["file_name"];
// print_r($config);
$this->load->library('image_lib', $config);
$this->image_lib->resize();
$this->load->model('stdimage_model');
unlink('./studentphoto/'.$data["file_name"]);
$image_data = array(
'studentimage' => $stdid.'-'.$data["file_name"],
'StdID' => $stdid,
'xsession' => $xsession
);
$this->stdimage_model->insert_image($image_data);
echo $this->stdimage_model->fetch_image();
//echo '<img src="'.base_url().'upload/'.$data["file_name"].'" width="300" height="225" class="img-thumbnail" />';
}
}
}
}
/* End of file data_agen.php */
/* Location: ./system/application/controllers/welcome.php */
--------------------End Controller-------------------------------------------------------------------
Create the Model
Put the model name : stdimage_model
<?php
class stdimage_model extends CI_Model {
function fetch_image()
{
$xsession = $this->input->post('xsession');
$stdid = $this->input->post('stdid');
$output = '';
$this->db->select("studentimage");
$this->db->from("std");
$this->db->where('StdID',$stdid);
$this->db->order_by("id", "DESC");
$query = $this->db->get();
foreach($query->result() as $row)
{
$output .= '
<div class="col-md-3">
'.$xsession.'
</div>
<div class="col-md-3">
'.$stdid.'
</div>
<div class="col-md-3">
<img src="'.base_url().'studentphoto/'.$row->studentimage.'" class="img-responsive img-thumbnail" />
</div>
';
}
return $output;
}
function insert_image($data)
{
$this->db->insert("std", $data);
}
}
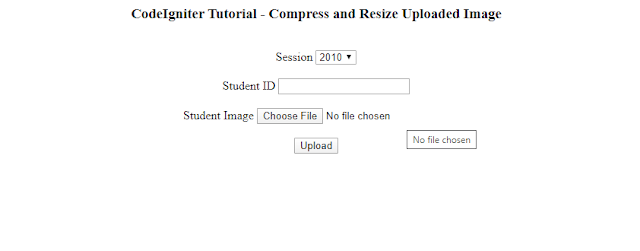
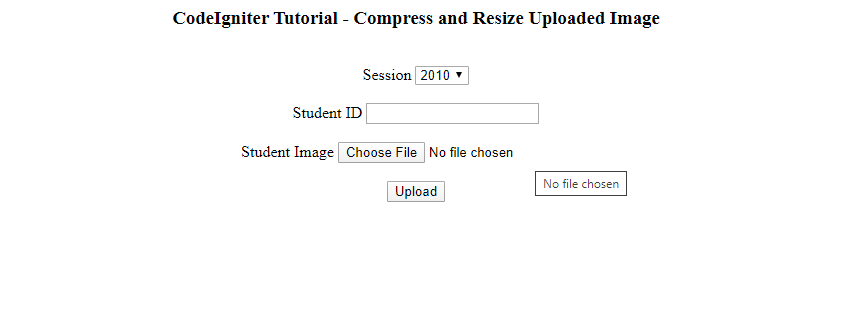
after doing all of that. let run the page. and the page will display like this.
after upload the image it will show like this..................

#Tag
codeigniter seo helper,codeigniter seo library,how to create dynamic url in codeigniter,
slug in codeigniter,how to optimize codeigniter website,image compression code in codeigniter
codeigniter seo friendly url htaccess,codeigniter query optimization,codeigniter compress image before upload,image upload and crop in codeigniter
,php compress image before upload,codeigniter resize image base64,codeigniter image upload,image upload error in codeigniter,image resize not working in codeigniter,image upload and display in codeigniter,how to resize image size(quality) with codeigniter image_lib


I will share my experience in image optimization ... At first, I had to manually compress all the pictures through Photoshop. The most free option by the way (except for the cost of a license for Photoshop). But this process takes a lot of time if there are more than 10-20 pictures on the site. After all, each picture must be manually processed, and then upload on the site again. Tedious such a process ... Now I use this service - https://optipic.io/ It saves a lot of time) It works by itself - automatically - only 1 time it needs to be connected to the site. Google is satisfied)
ReplyDeleteits working great. thank you
ReplyDeleteThank you because you have been willing to share information with us. we will always appreciate all you have done here because I know you are very concerned with our. images data entry
ReplyDelete